
|
|
|
|
|
Saab 9³ 2003+ Aux-in Cable DIY Installation Instructions
These instructions are intended to be used by a person with moderate skill. More involved than changing a wiper blade, but less than installing a subwoofer. If you would like to have your dealer install this, please visit us on the web at www.etadyne.com for dealer installation instructions. !Please read all instructions prior to actually diving in! Standard disclaimers: While Saabs in general are put
together very intelligently, with parts that are meant to come apart logically &
easily, please use your own judgment in how much force to apply. If you feel as
you’re going to break a clip, stop, reread the instructions, perhaps
interpret them differently, then try again. If that still doesn’t work, ask for
help. Lastly, ask your dealer to do it. Etadyne Industries LLC or Nova Technology
Inc. will not be held liable for turning your warranted car into a big paperweight.
Tools you’ll need to complete this installation:
Step 0:
Quick notes.
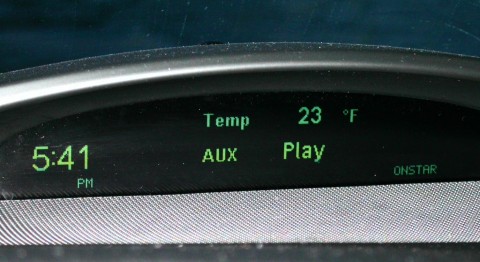
-The only difference between manual & automatic climate control is that manual has 1 plug in the back instead of 2 for the automatic. Faceplate removal & re-installation is exactly the same. -The only difference between a single CD & 6-CD changer is...nothing. Removal & re-installation is exactly the same, and it does not have any different connection method. The Aux-in plug used for this installation is still available. Step 1: Enable “Aux-In” as a source for your stereo,
if you haven’t already.
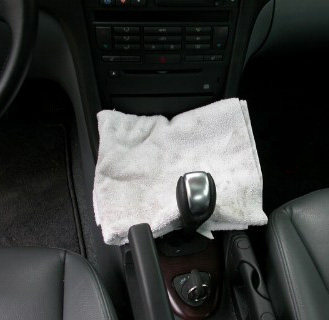
Step 2:
Prepare a work area.
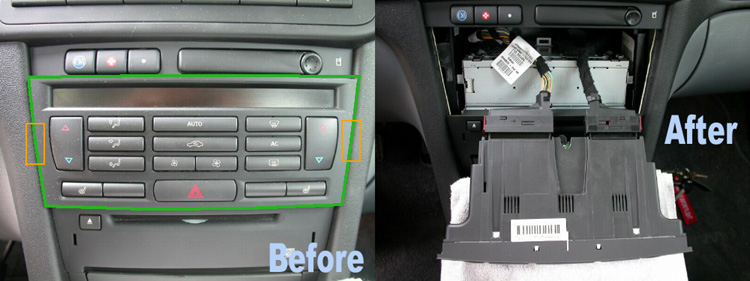
Step 3: Remove & unplug HVAC faceplate.
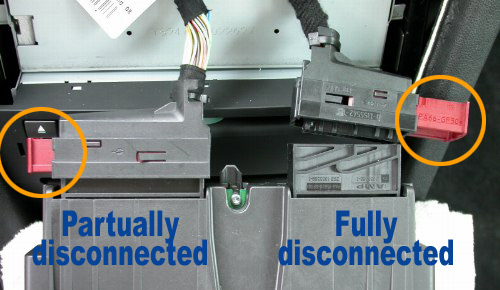
Pull the unit towards you, stretching the 2 cables that attach it. Pull the maroon clips that hold the connectors outwards. They will extend 10mm, and take a little bit of force. Once extended they will automatically unplug themselves from the HVAC unit. Place the unit someplace safe for now. NOTE: Manual climate control will only have 1 cable. This does not affect removal.
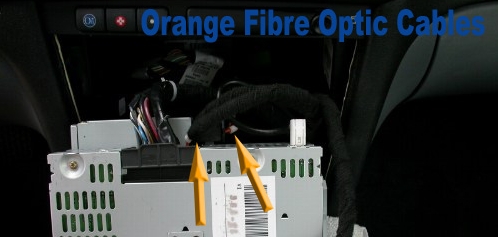
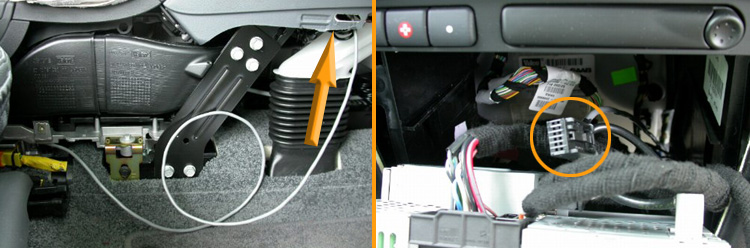
Step 4: Remove EHU.
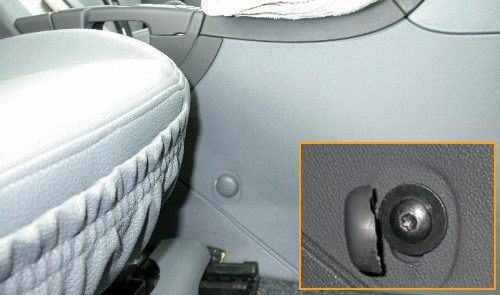
Eventually you will work the CD player loose. The EHU is attached to it, on top. Gently slide it towards you. Take note of the rails it slides on so you can put it back. Continue to slide it out until it’s free. Angle it down so the face sits on the towel you placed in Step 1. Caution! Take care not to damage the orange fibre-optic cables by bending them too much. They are very sensitive to bends, and are made of glass, not flexible wire. Step 5: Remove center console side trim screw.
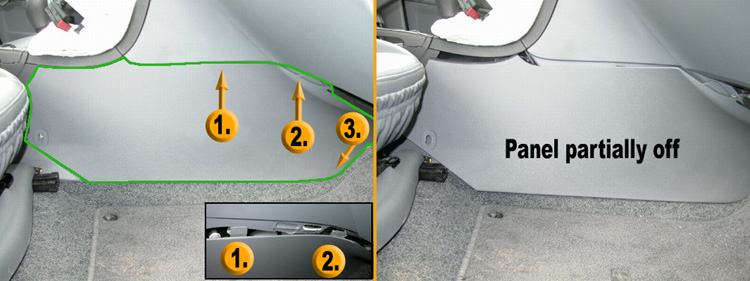
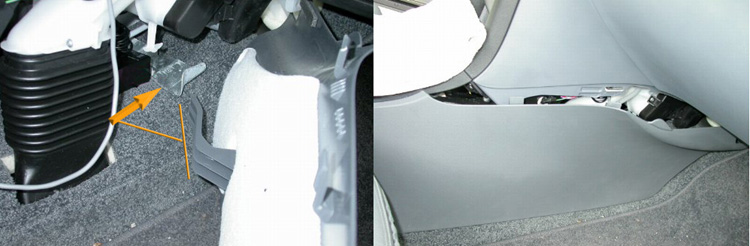
Step 6: Remove two right side center console side
trim panels.
For the rearward panel, move the seat full forward, release the 2 attachment points in the rear of the panel, & slide it backwards. Move the seat full rearward again. You are now ready to route & connect the cables!
Step 7: Route Aux-in cable through armrest, install
miniplug jack.
Once it’s through, assemble the shroud (extra black hollow plug) to the black plug. It will only go on 1 way. It will "click" when assembled correctly, & will not slide off.
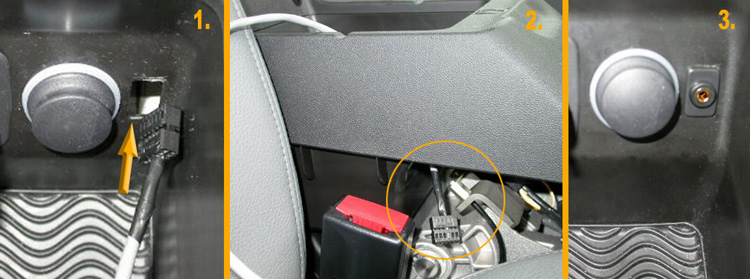
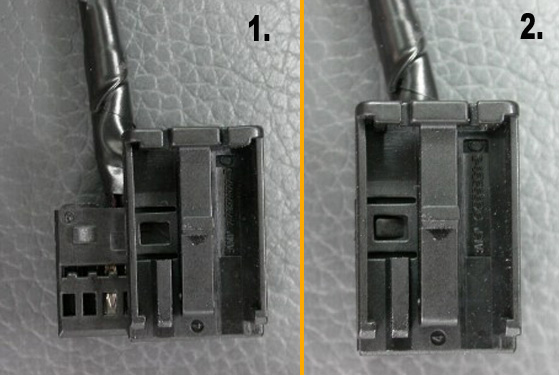
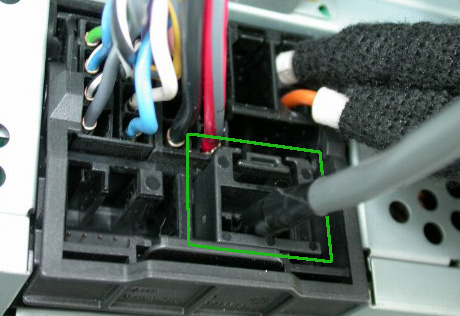
Step 8: Route cable & plug into EHU.
Connect the plug to the back of the EHU. It will only go in 1 place 1 way. It will "click" when installed correctly, & will not pull out.
Step 9: Test your installation.
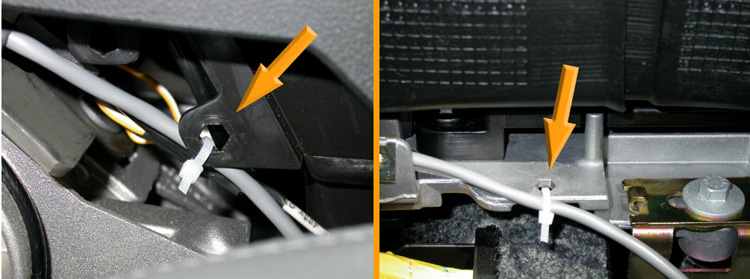
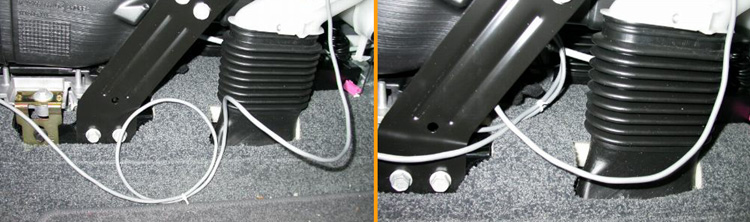
Step 10: Secure cable.
CAUTION! Pay special attention to ensure cable will not interfere with operation of parking brake. If you choose to test the parking brake to see how it hits the cable, remember your car may roll as it is in Drive! Step 11: Reassemble vehicle.
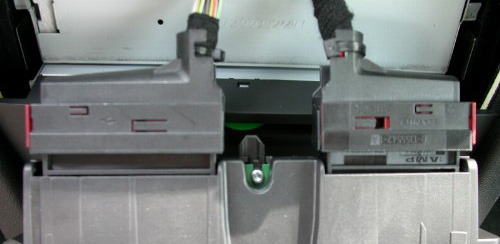
Plug the HVAC in using the 2 cables you have in 1 hand. Extend maroon clip & place on the HVAC side. Push the maroon clip in. It will cam itself into place. Repeat for other side. Slide unit into center stack. It will slide in & snap quietly into place. This illustration show the connectors properly connected. Remember manual climate control will only have 1 plug.
Reinstall the plastic trim pieces. The rear one has 2 attachment points in the rear of the panel. The pin goes in the slot, and the tab sits on the metal flat. Line the forward hole up with the screw hole. Like so:
The forward one has a guide leg to help you. Once the leg is engaged, and the top edge of the trim us under the top black fixed trim, slide forward until the screw holes match up.
After both pieces are in, align both panels with the screw hole, install the screw & snap the cover closed. Step 12: Clean up.
Back to Documentation |
|
Questions or problems regarding this web site should
be directed to webmaster@etadyne.com. |


