|
|
|
|
|
Saab 9³ 2003+ MOST Loopback DIY Installation Instructions !Please read all instructions prior to actually diving in! Standard disclaimers: While Saabs in general are put
together very intelligently, with parts that are meant to come apart logically &
easily, please use your own judgment in how much force to apply. If you feel as
you’re going to break a clip, stop, reread the instructions, perhaps
interpret them differently, then try again. If that still doesn’t work, ask for
help. Lastly, ask your dealer to do it. Etadyne Industries LLC or Nova Technology
Inc. will not be held liable for turning your warranted car into a big paperweight.
Tools you’ll need to complete this installation:
Step 0:
Locate & gain access to desired module. Remove that module in order to gain access to the electrical connectors at the back of it.
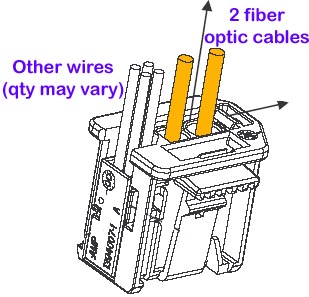
Step 1: Unplug connector. Unplug connector from O-bus device. The connector will be a housing with wires, and 2 large orange fiber optic cables.
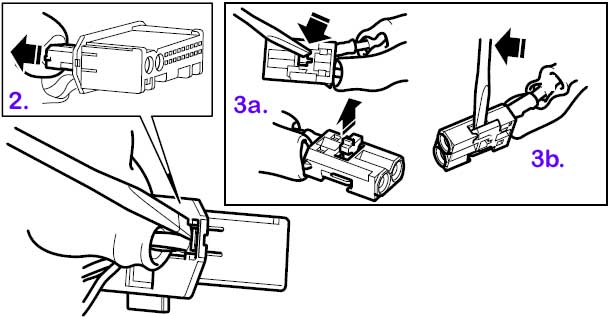
Step 2: Release fiber optic connector. Detach the fiber-optic connector housing from the main connector. It will come loose by releasing a catch on the housing.
Step 3: Remove cable from connector. Remove one of the two fiber optic cables from the housing. It doesn't matter which one. 3a. Remove blue TPA
by pushing it from the small side. It will need to completely come out. Keep
it as you must put it back later.
Step 4: Prep cable. Prepare the cable to make a loop. Cut enough of the wire wrapping to ensure that the cable will not make any radii less than 25mm when connected end to end.
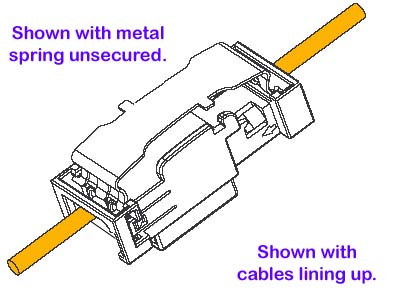
Step 5: Prep Loopback. Get your 2003+ Saab 9³ MOST Loopback Connector and make sure the metal spring is released (spaced about 4mm from plastic body).
Step 6: Install connector. Insert the fiber-optic connector containing 1 cable into the Loopback, and press closed that end of the metal spring.
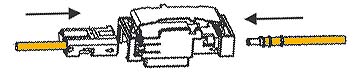
Step 7: Install free cable. Insert the free fiber optic cable into the opposite end of the Loopback, lining up to the position of the other one. They must be in line, end to end, so light travels from one into the other.
Step 8: Secure installation. Push the cable in reasonably firmly, and snap that end of the spring closed. Both cables should be snugly installed with no loose play. That's it! Back to Documentation |
|
Questions or problems regarding this web site should
be directed to webmaster@etadyne.com. |